


How to Replace a Light Switch in 10 Minutes Step-by-Step Guide

Summary
A faulty light switch rarely gives up without some kind of warning first. It might feel loose underfoot, flicker at odd moments, or simply stop responding one day. That can be genuinely frustrating, but the fix is often far simpler than most homeowners expect. This guide covers how a standard switch works, what tools are needed, the full replacement process, and the common hiccups that tend to show up during installation along with practical ways to handle them.
Introduction
A light switch is one of those things that just gets on with the job.
Nobody pays much attention to it. The switch near the kitchen door gets pressed before the first cup of tea. The hallway one gets hit countless times throughout a busy week. Everything moves along and the switch quietly does what it is supposed to do. Until one day it does not.
Sometimes the light flickers for a few days before anything becomes obvious. Sometimes the switch starts to feel different under the finger, almost as though something inside has quietly worn through. Then the moment arrives where pressing it does absolutely nothing at all.
The good news is that a standard switch is often far less complicated to replace than most people assume. With a bit of preparation and careful attention to safety, the job can usually be wrapped up in a surprisingly short amount of time.
Understanding Light Switches
Most people only think about electrical components the moment something stops working.
That is completely understandable. Switches are built to operate quietly in the background. Each time one is pressed, internal contacts either allow electricity to flow through the circuit or interrupt it entirely. It is a simple action, but it happens thousands of times across the life of the device.
Over the years, those internal parts begin to wear. A switch may become less responsive, start to feel loose, or produce inconsistent results from one press to the next. This is often the point when replacing switches makes more sense than putting up with the inconvenience any longer.
The type of switch matters too. Bedrooms and living rooms tend to use single-pole switches, while hallways and staircases often rely on multi-location control setups.
Modern switches and sockets are built to improved safety standards with stronger materials throughout, which generally makes them more dependable than the older products still fitted in many homes today.
Tools and Materials Needed for Installation
Good preparation makes electrical work noticeably easier. There is nothing more frustrating than opening a wall box only to realise that an important tool has been left in another room.
A Reliable Screwdriver Set
A screwdriver might seem like an obvious item to mention, but picking the right one genuinely makes a difference.
Faceplate screws and switch mounting screws can become worn over the years. A properly sized screwdriver gives better grip and reduces the chance of chewing up the head before the job is even finished.
Many experienced electricians prefer insulated tools for day-to-day work. They offer an extra layer of protection and tend to make routine electrical tasks feel more controlled and manageable.
A Voltage Tester for Safety
There is always that moment of doubt after switching off the breaker.
Was the right circuit actually disconnected?
That uncertainty is precisely why a voltage tester belongs in the toolkit. It confirms there is no live current before any wiring gets touched.
During a light switch replacement, taking a few seconds to test for voltage can prevent unnecessary risk. It is one of the simplest safety habits to build and arguably one of the most valuable.
A Suitable Replacement Switch
Not every switch is the same.
Before buying a replacement, check the existing configuration and rating. Matching those specifications helps ensure a smooth installation and reliable performance once the job is done.
Many homeowners use this as an opportunity to upgrade worn faceplates at the same time. Fresh switches and sockets can make an older room feel noticeably neater without requiring any major renovation work. Small changes sometimes have a surprisingly significant visual effect.
Steps to Replace a Light Switch
This is the part that causes the most anxiety for people. In practice, the process tends to be quite manageable when approached step by step.
Turn Off the Power Supply
The first rule when learning how to replace a light switch is straightforward.
Disconnect the power.
Find the appropriate breaker and switch it off. Then return to the room and confirm the light no longer works. A voltage tester should also be used before touching any conductor.
Rushing through this step is never worth the time saved. A few extra moments spent confirming everything is safe makes the rest of the process far more comfortable to work through.
Remove the Existing Switch
Once the power has been confirmed off, remove the faceplate and set it aside somewhere safe.
Next, loosen the mounting screws that hold the switch to the electrical box. Pull the switch forward carefully until the wiring behind it becomes visible.
Before disconnecting anything, take a photograph. That habit saves a lot of confusion later. Electricians do the same thing whenever they replace switches because wiring layouts can vary quite a bit between different installations.
Connect the New Switch
Understanding how to replace an electrical switch becomes considerably less daunting when the wiring is tackled one connection at a time. Transfer each wire from the old switch to the matching terminal on the replacement. Tighten the screws securely and inspect each connection carefully before moving on.
Loose wiring causes many of the problems that appear after installation. Once everything looks correct, gently fold the conductors back into the electrical box before mounting the switch in place.
Restore Power and Test Operation
This tends to be the most satisfying part of the whole process.
Secure the switch, reinstall the faceplate, and restore power at the breaker panel. Test the switch several times rather than just once.
Anyone learning how to change a switch should pay attention to consistency here. The light should respond straight away and operate normally every single time. If it does, the installation has almost certainly been completed correctly.
Common Installation Problems and Their Solutions
Even a straightforward electrical job can occasionally throw up something unexpected. Fortunately, most issues have fairly simple explanations.
The Light Stays Off
A newly installed switch that refuses to operate can be disheartening.
After working through the steps to replace light switch components, the most common culprit is an incorrect wiring connection. A loose terminal screw is another possibility worth checking.
Switch the power off again and compare the wiring layout with the photograph taken before removal. In most cases, the issue becomes clear once the connections are looked at carefully and methodically.
The Light Flickers Occasionally
Flickering lights usually point to an unstable electrical contact somewhere in the setup.
A conductor may not be sitting securely beneath its terminal screw, or an older wire may have shifted slightly during installation. The fix is usually straightforward.
People researching how to change switches often encounter this with older residential wiring. Going back over each connection generally restores stable operation and clears up the flickering.
The Switch Feels Loose After Installation
A switch should feel solid and secure every time it is pressed.
If there is noticeable movement, check the mounting screws and confirm the device sits evenly within the electrical box. Small adjustments often sort the problem immediately.
During renovation projects, updating old switches and sockets tends to improve both the look and the feel of a space while producing a more stable and professional-looking result throughout.
Conclusion
Knowing how to replace light switch devices is a practical skill for any homeowner. A faulty switch is an inconvenience, but it rarely calls for a complicated repair or a lengthy service visit.
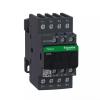
Whether carrying out a single light switch replacement or working through several switches across the house, choosing dependable products matters. Schneider Electric offers durable solutions designed to meet the demands of modern residential electrical systems. You can shop from its eShop to get the products delivered at your doorstep.
FAQs
Q1. Can a light switch fail gradually instead of suddenly?
Yes. Many switches show early signs such as flickering, inconsistent operation, or a loose feel well before they stop working entirely.
Q2. Why does a switch make a louder click than before?
A louder-than-usual click can indicate wear inside the switch mechanism and may be a sign that replacement is worth considering.
Q3. Is it normal for older switches to feel stiff?
Older switches can stiffen up because of internal wear, dust that has accumulated over time, or components that have aged past their useful life.
Q4. Can painting around a switch affect its performance?
Excess paint can sometimes interfere with switch movement or faceplate alignment, particularly during renovation work.
Q5. Should matching switches be used throughout a home?
There is no strict requirement, but matching devices tend to create a more consistent look and can make future maintenance simpler to manage.
Comments